

The fastest way to a curated fridge gallery is to swap loose photos and magnets for a framed-look layout, either a tight grid or a loose salon arrangement, spaced consistently across the door. DIY magnetic frames are the workhorse technique here, and they take minutes, not weekends. Upkeep is just as simple: a damp microfiber cloth and mild dish soap keep everything looking sharp.
TL;DR:
- Using magnetic frames arranged in a tight grid or salon style creates a deliberate, cohesive look with minimal effort and simple upkeep.
- Anchoring your display with a central, meaningful photo and maintaining consistent spacing ensures an intentional and balanced gallery layout.
- Smaller magnets should be placed high enough to keep tiny children safe, and non-magnetic surfaces require adhesive strips for secure mounting.
- Limiting dimensional elements to one or two per section prevents clutter, while textured pieces add visual interest without overwhelming the display.
- Opt for framed or magnetized display items that are ready to place, with sizes ranging from 2 to 3.5 inches, ensuring they complement the overall design.
Table of Contents
- Fridge Gallery Ideas for Every Style, From Minimal to Chaotic-Good
- How Do You Space Out a Fridge Gallery So It Looks Intentional?
- How to Make DIY Magnetic Frames That Lie Flat
- Cleaning and Maintaining Your Fridge Gallery
- Three Fridge Gallery Styling Sets Worth Copying
- Incorporating 3D Elements and Mixed Media Into Your Gallery
- Keeping Kids Safe Around Fridge Magnets and Displays
- A Note From Faintest Ink on Handmade Magnets and Keepsakes
- Get Your Fridge Gallery Started With Faintest Ink
- Sources
- FAQ
Fridge Gallery Ideas for Every Style, From Minimal to Chaotic-Good
Not every fridge gallery should look the same, and honestly, the ones that feel most personal usually break at least one design rule on purpose. Start by picking a concept that matches how you actually live, then build out from there.
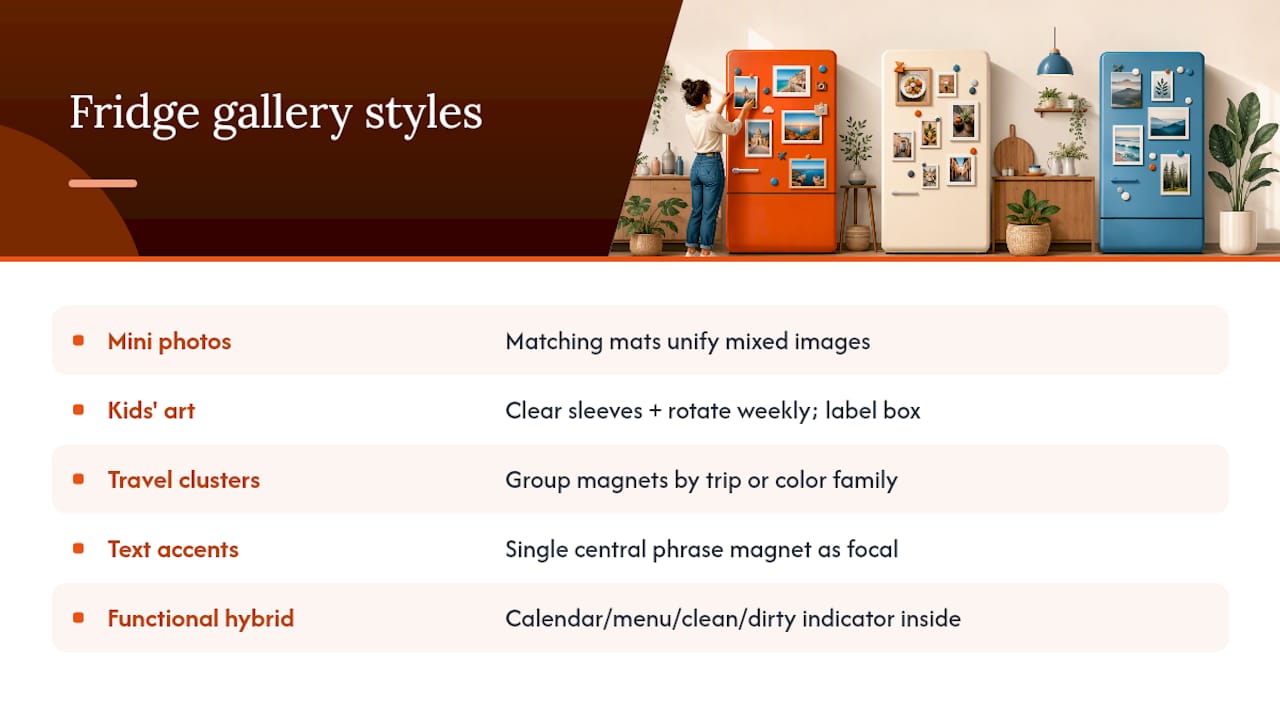
Mini framed photos with matching mats. This is the cleanest option if your photo collection is a mismatched pile of vacation shots, kid pictures, and the occasional pet portrait. A consistent mat or border unifies mixed items, so even wildly different photos read as one cohesive set instead of a scattered mess.
Kids’ art gallery with a rotation system. Slide artwork into clear plastic sleeves before magnetizing them, so spaghetti sauce and marker bleed don’t ruin the piece underneath. Swap out two or three pieces every week and keep the “retired” art in a labeled box.
Travel-themed magnet clusters. Group magnets by trip or by color family rather than scattering them randomly. A red, orange, and yellow cluster from three different countries reads as intentional; the same magnets scattered across the door do not.
Text and humor magnets as focal accents. A single witty phrase magnet placed dead center, surrounded by photos, does more visual work than five more pictures would. Faintest Ink’s text magnets are built for exactly this kind of accent piece.
Functional hybrids. A small dry-erase calendar, a rotating menu card, or a dishwasher clean/dirty indicator can sit inside the gallery instead of off to the side, so the whole door works as decor and a household tool at once.
Pro Tip: *Pick one “anchor” category, photos, text, or a theme, and let it take up the majority of the space.
How Do You Space Out a Fridge Gallery So It Looks Intentional?
Start with a focal piece, not the edges. Pick your largest or most meaningful photo and mentally place it slightly above the vertical center of the door. Everything else builds outward from there, the same logic designers use when they center a wall gallery around eye level, usually around 57 to 60 inches off the floor.
From there, the spacing math is simple:
- Leave a small, consistent gap between small framed magnets for a clean, gallery-like look.
- Keep spacing identical across a grid layout. Uneven gaps are the number one reason a grid reads as sloppy instead of styled.
- For a salon-style mix, vary the spacing slightly but never let two pieces touch or overlap.
- Mix sizes deliberately rather than randomly.
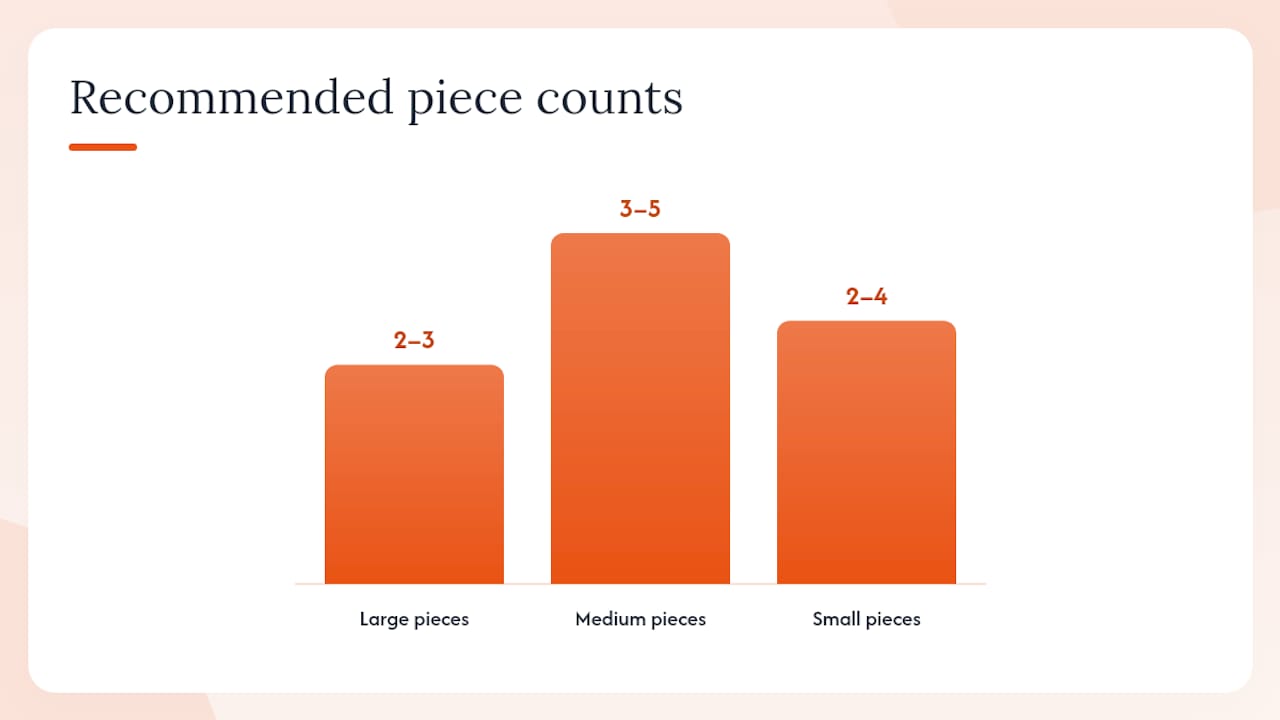
A tested ratio worth borrowing: gallery-wall planners recommend balancing two to three large pieces, three to five medium pieces, and two to four small pieces for visual stability. That ratio works just as well at fridge scale, just shrink the piece count to match your door size.
A grid works best when your collection is uniform, same-size frames, similar subject matter. A salon layout suits a more eclectic mix of photos, text magnets, and 3D pieces. A single row down the side works well on narrow French-door fridges where a full grid would crowd the handle.
Before you commit to a layout, trace your frame shapes onto paper and tape the templates directly to the fridge. This lets you mark exact positions and shuffle things around without leaving guesswork to trial and error, borrowing the same template trick gallery-wall planners use for nail placement, minus the nails.
If you can’t see the fridge’s actual surface behind the display, you’ve gone too far. Pull two or three pieces and store them for the next rotation.
How to Make DIY Magnetic Frames That Lie Flat
Here’s what you need: mini frames or frame fronts (thrifted ones work great), magnetic tape or adhesive-backed magnetic strips, your photos or art, scissors, and a ruler.
- Remove the pre-installed backing or glass insert from each mini frame.
- Cut magnetic tape into strips and apply them around the inner edges of the frame, back side.
- Insert your photo or art piece so it sits flush against the magnetic backing.
- Press the frame against the fridge and check the alignment before pressing firmly.
- Adjust placement slightly if needed, then apply firm pressure to set the adhesive.
The whole process, according to the original magnetic frame method, takes just a few minutes per frame once you’ve got your materials laid out.
If your fridge has a non-magnetic front (some stainless and matte finishes may not hold magnets well), use low-residue removable adhesive strips on the frame back instead, or slide art into acrylic sleeves mounted with the same strips.
Pro Tip: Run a continuous magnetic strip along the top and bottom edges of the frame, with only short strips on the sides. This keeps the piece from swinging every time you open the door.
Cleaning and Maintaining Your Fridge Gallery
A gallery only looks curated if it stays clean, and magnets pick up kitchen grime faster than most people expect.
- Wipe magnets and the fridge surface with a soft microfiber cloth, warm water, and a small amount of mild dish soap.
- Skip bleach, ammonia, and anything abrasive. These can strip printed finishes or dull magnet coatings fast.
- Never soak magnets in water. A damp cloth is enough; submerging can weaken the adhesive or magnetic backing over time.
- Store flexible or sheet-style magnets flat when they’re not in use. Storing them upright or bent causes warping that’s hard to reverse.
- If a magnet leaves adhesive residue after a move, a little rubbing alcohol on a cloth usually lifts it without damaging paint.
- Replace a magnet’s backing once it stops holding flush against the fridge. A magnet that constantly slides isn’t worth fighting.
Three Fridge Gallery Styling Sets Worth Copying
Set A: The family corner. Arrange four or five custom photo magnets in a tight two by three grid, then center a small text magnet underneath as a caption, something like a family name or year. Keep spacing under 2 inches for a cohesive, framed-gallery feel.
Set B: The funny lineup. A horizontal row of themed text magnets works as comic relief near a coffee maker or snack cabinet. Mixing pieces like the Less People, More Dogs Magnet with a couple of finish variations, matte next to glossy, keeps the row visually interesting instead of flat.
Set C: Event and announcement cluster. Group Save the Date magnets with a small handful of related photos, engagement shots, venue snapshots, kept tight with minimal gaps. This set works especially well as a temporary display that swaps out once the event passes.
For sizing, the 2.5 by 3.5 inch format reads clearly from a few feet away without overwhelming a standard fridge door, while 2 by 2 inch pieces work better packed into denser clusters.
Incorporating 3D Elements and Mixed Media Into Your Gallery
Flat photos and text magnets carry most of a fridge gallery, but a few dimensional pieces keep it from feeling like a flat sheet of paper taped to metal. Small wooden letter magnets, tiny woven baskets mounted on magnetic backing, or a pressed flower under glass all add texture without taking up much visual real estate.
Ticket stubs, postcards, and pressed leaves work well tucked into small clip-style magnetic holders rather than laid flat, since the slight lift off the surface reads as more intentional. A single 3D object, a tiny magnetic hook holding a dried flower, or a small metal charm, placed near your focal photo can act as a visual break between denser photo clusters.
The trick with mixed media is restraint. One or two dimensional pieces per gallery section is plenty; more than that and the layout starts to look cluttered rather than curated. Keep heavier objects (anything beyond a few ounces) on stronger neodymium-style magnets rather than the thin flexible sheets used for paper photos, since sheet magnets aren’t built to support real weight.
Pair dimensional pieces with flatter elements nearby to keep the eye moving naturally across the door instead of snagging on one heavy corner. If a 3D piece falls off more than once, it’s too heavy for its magnet, not a placement problem.
Keeping Kids Safe Around Fridge Magnets and Displays
Small magnets and young kids are a genuinely risky combination, not just a decorating inconvenience. Magnets small enough to swallow pose a serious choking and internal injury risk, especially for children under three who explore objects with their mouths.
Keep tiny magnets, the kind used on thin paper photos or small text pieces, above the reach of toddlers, generally in the upper half of the fridge door rather than at knee height. Save the lower sections for larger, sturdier pieces that can’t be pried off easily or swallowed if they do come loose.
Check magnet strength periodically. A magnet that’s lost its grip and slides off with a light touch is one a curious toddler can remove just as easily. If you have young children in the house, favor magnets with backing strong enough to resist casual tugging, and skip magnetic frame builds with small loose parts like tiny screws or clasps.
Glass-fronted frames carry their own risk if a curious child manages to pull one down. Where possible, choose acrylic or plastic frame fronts for anything mounted at a reachable height, and reserve glass for pieces well above a toddler’s grasp.
A Note From Faintest Ink on Handmade Magnets and Keepsakes
Every custom order goes through a proof approval step before production, because a photo that looks great on a screen doesn’t always translate to a 2 by 2 inch magnet. That’s the real value of a handcrafted process: catching sizing or cropping issues before they become a finished product.
Choosing between text and photo magnets usually comes down to purpose. Photos carry memory; text carries personality. A gallery built entirely from one or the other tends to feel flat compared to a mix of both.
— Faintest Ink
Get Your Fridge Gallery Started With Faintest Ink
Faintest Ink is the option for anyone who wants gallery-ready pieces without cutting mats, hunting for mini frames, or guessing at magnetic tape strength. Every photo magnet and text magnet arrives ready to place, already sized for the kind of tight, gallery-style spacing this guide walks through.
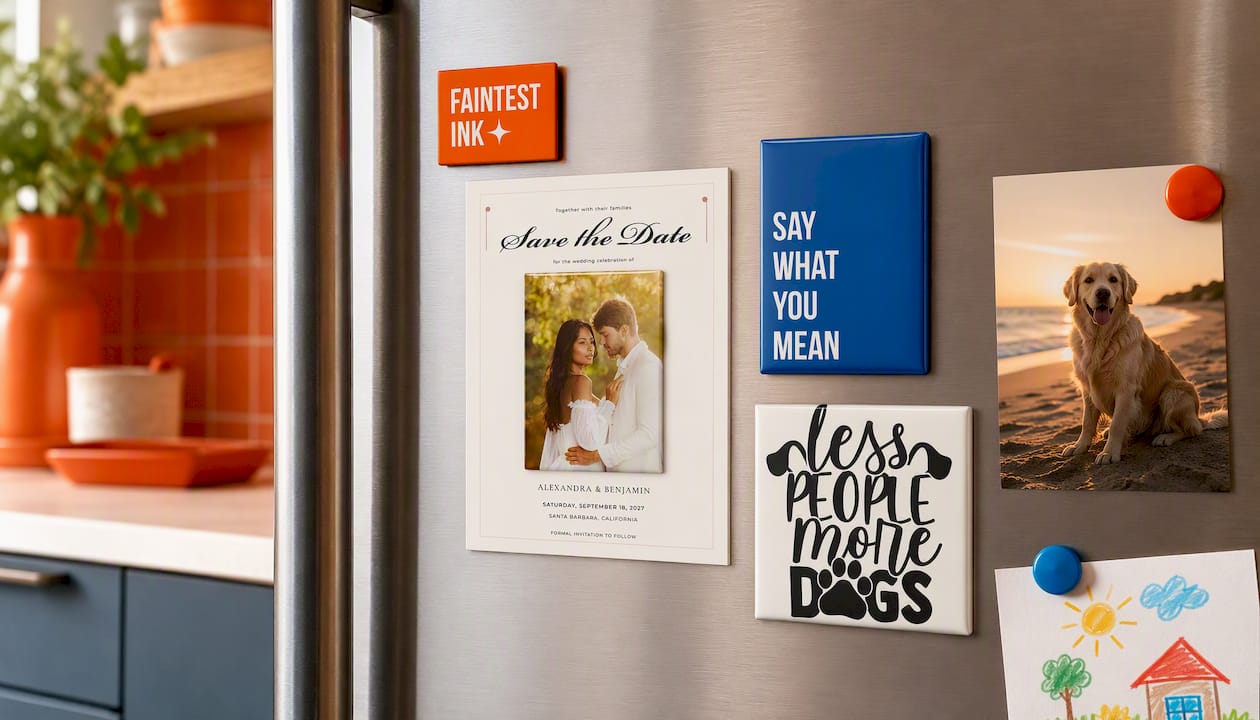
If you’re building the “family corner” set, start with custom photo magnets sized for a tight grid. For the “funny lineup,” browse text magnets sized at 2.5 by 3.5 inches, easy to read from across the kitchen without dominating the door. Planning an engagement announcement or wedding update? The Save the Date magnets come paired with matching 5 by 7 cards, priced from $90 to $1,270 depending on order size. Prefer something smaller and punchier for a single accent piece? Custom text magnets at 2 by 2 inches run $12 each and slot easily into a denser cluster. Upload your photo or write your line, approve the proof, and it ships ready to stick.
Sources
- This DIY magnetic frame hack is the solution to messy fridge doors | Homes and Gardens
- The care and feeding of different kinds of magnets | Adams Magnetic
- How to measure and plan a balanced gallery wall – Frameology
- Kitchen wall decor ideas | The Spruce
FAQ
What’s the fastest way to make a fridge gallery look curated?
Use magnetic frames in a consistent grid or salon layout with even spacing, generally 2 inches or less between small pieces, and anchor the arrangement around one focal photo or magnet.
How do I arrange magnets on a fridge without it looking cluttered?
Pick a focal piece near the visual center of the door, keep spacing consistent, and stop adding pieces once the fridge surface behind the display starts to disappear.
What should I avoid when cleaning fridge magnets?
Skip bleach, ammonia, and abrasive cleaners, and never soak magnets in water; a damp microfiber cloth with mild dish soap is enough.
Can I use magnets on a stainless steel or non-magnetic fridge?
If your fridge front isn’t magnetic, use low-residue removable adhesive strips on the back of frames instead of magnetic tape.
Does Faintest Ink sell magnets suited for gallery-style displays?
Yes. Faintest Ink offers custom photo magnets, text magnets in 2 by 2 and 2.5 by 3.5 inch sizes, and Save the Date magnets with matching cards, all sized for gallery-style fridge layouts.